Setting Up the Student Survey Feature

J1 Desktop Setup

Configure J1 Desktop to support Campus Portal Surveys

Perform the following steps to configure J1 Desktop to support the Student Survey feature.

  1. Open the Student Life Configuration window.

  2. Click the Residence Life tab. Example

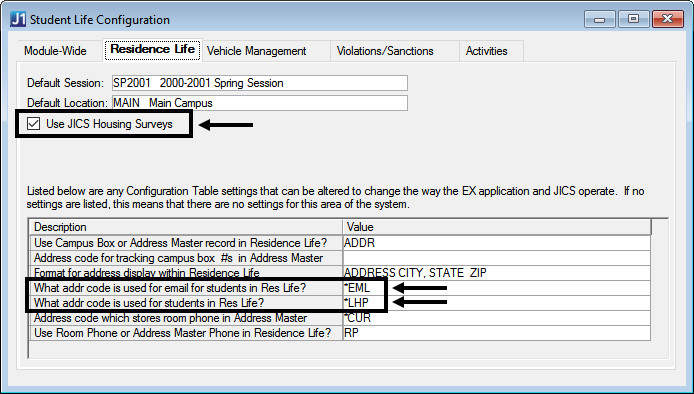
  3. Select the Use JICS Housing Surveys checkbox if you want to use JICS to conduct housing surveys.

    1. If you select the Use JICS Housing Surveys checkbox, you must enter address codes in the following two Configuration Table rows. If you have already configured J1 Desktop for the Residence Info feature, you may have already entered this information.

      1. What addr code is used for email for students in Res Life? In a default setup, this code is *EML.

      2. What addr code is used for students in Res Life? In a default setup, this code is *LHP.

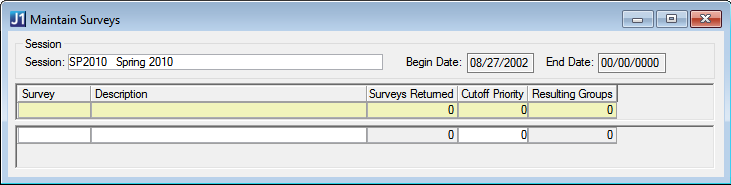
    2. If you select the Use JICS Housing Surveys checkbox, you must create a survey code in J1 Desktop. The Session and Survey code will be used when you generate the survey in Form Builder.

      1. Open the Maintain Surveys window. Example

      2. In the Session drop-down list, choose the appropriate Year and Term.

      3. Right-click in the grid and choose Add Row.

      4. Enter the Survey Code, Description, and Cutoff Priority for the survey.

      5. Click the Save button.

JICS Setup

Configuration settings in JICS can be done by roles with permission to access and administer global and portlet settings.

If you are an administrator and need help setting up and configuring this feature, see the detailed setup sections below.  

Define Feature-Specific Permissions and Settings

  1. Log in to the campus portal as an administrator and navigate to the appropriate portal page.

  2. From the Admin Toolbar , click Access. The Access page appears.

  3. Click on the campus portal role you are setting up permissions for. If the role has not already been granted access to the page, click the button to toggle it to Visible .  

  4. Additional permissions appear.

  5. To grant administrative privileges to a campus portal role, click the button for the Allow this role to manage this page permission to move the toggle to "Yes".  Administrative permissions will allow the users in the role to add or remove features and set page and feature level permissions.

  6. From the in Student Survey they can: section, use the toggle buttons set permissions.  

Changes are saved automatically.

  1. From the Admin Toolbar , click Preferences. The Preferences page appears.

    1. In the Auto-Fill My Personal Info drop-down list, choose Yes or No as to your preference.

    2. Click Save Changes.

  1. From the Admin Toolbar , click Settings. The Settings page appears.

    1. In the Form Type drop-down list, choose the form to be used in this feature. In most cases, it will be StudentSurvey. You must choose a Form Type in order for the Setup option to be available to create the form.

    2. Click Save Changes.

To create the survey form, see the Creating the Student Survey Form topic.